Papier - mache is the simplest and most accessible type of needlework. His history of such needlework began in China, although the name is French, it means chewed or crumpled paper.

Very soon, this kind of needlework reached Europe, they made a wide variety of boxes, dolls, toys, masks, and even furniture can be found. papier - mache appeared, like many other things, thanks to Peter
It is very easy and inexpensive to learn how to create papier crafts - mache with your own hands. PVA paper and glue, or an alternative paste (flour glue), besides, flour creates a denser layer and will last longer. In addition, it is completely safe for children, which is taught in the older groups of the kindergarten or in the lower grades of school.

Papier-mache technique
The technique is very simple and straightforward. Using them, you can create from ordinary simple dishes to furniture.

The first type of technology
This is the classic way. In order to learn the first type of papier-mache technique, it is better to use ordinary dishes, for example, a plate, bowl or glass, preferably with rounded edges. You can use balloons.
Before making crafts, you need to prepare everything that is useful for work. And instruct the students.

For this you need:
- Newspaper or tissue paper;
- Deep bowl
- Paste (made from ordinary flour and water, we will tell you the exact description of how to make the paste a little later) or PVA glue;
- Model for crafts.


Progress:
- After preparing all the necessary materials, you can start working. Cut the paper according to the sample prepared in advance by the teacher or teacher into squares or thin strips, and put it in a bowl.
- The teacher prepares the paste in advance, since it is used only in a cooled form, pour it into molds for each child. Model for papier - mache grease with vegetable oil or wrap with cling film.
- Do not forget to prepare the dishes with water, because the first layer of paper does not stick, it needs to be soaked in water and applied to the model. Further, all layers are coated with paste or PVA.
And let it dry. And paint at your discretion.

The second type of technique
- When creating papier - mache using this technology, a mass of liquid paper pulp is used.
- The paper is cut into small pieces, then filled with hot water and left warm overnight.
- Then you need to boil, cool, squeeze, loosen and dry.
- After all these procedures, mix the resulting mass with chalk or glue.
- Pour the resulting mixture into a prepared mold and leave to dry completely.

But it is better not to use this option in kindergartens and schools, it is more suitable for professionals.

The third type of technique
When using this technique, thick cardboard is used, which is glued together to form the product you need. And also, like all previous methods, it is left to dry completely, painted and polished.

Material
In this paragraph, we will tell you in more detail how to make a paste and choose the right paper.

Glue
It is for schools and kindergartens that it is better to use PVA glue or paste. You can't tell a lot about PVA, since you can buy it in any store with office supplies.

The preparation of the paste is, in principle, ordinary. To do this, pour one glass of flour into a convenient saucepan, add three glasses of hot water and half a spoonful of salt.

At the same time, mix everything thoroughly so that there are no lumps.Then boil the resulting mixture for 10 minutes and stir constantly, then cool.

Paper
In fact, you can use any paper other than cardboard. Since cardboard is used for the manufacture of large and professional structures.

For children, it is better to take toilet paper, napkins, newspaper or sheets from a notebook.

Crafts in the kindergarten school
DIY papier-mache crafts for children are very diverse. Let's take a look at the most common crafts. Photos are attached.


Plate, saucer or bowl
- Such crafts are the easiest. As mentioned earlier, all the necessary items and tools must be prepared in advance.
- That is, take the dishes, while it is safer for children to use plastic dishes, but not disposable ones.
- Lubricate the surface with vegetable oil, lay out the first layer with damp paper and then lay out the layers, lubricating them with paste or PVA glue.
- You don't need to overlay too many layers, about 7 is enough.
- Allow the craft to dry, after drying, carefully separate the paper part of the craft and paint with ornaments or other drawings.

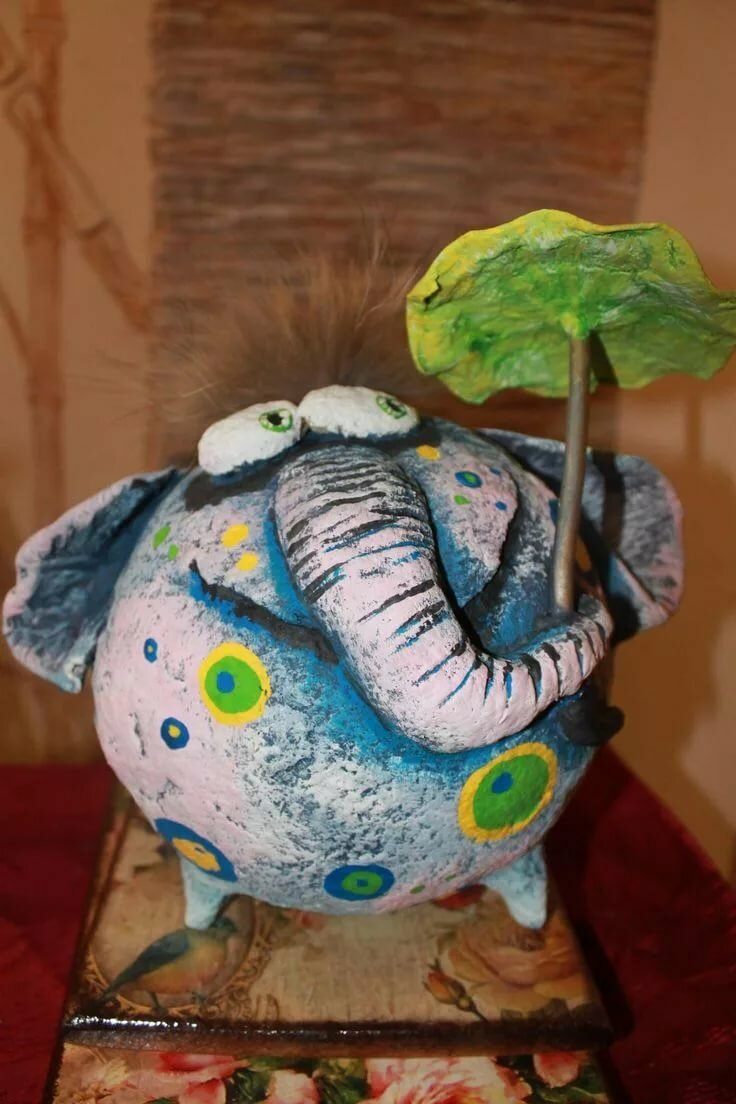
Balloon or ball crafts
- For this craft, we take a small helium ball or balloon.
- We coat it with vegetable oil, apply the first layer of paper with paper dipped in water, and then apply the required number of layers, lubricating with adhesive between ourselves.
- After completing all the manipulations, let the structure dry, then pierce the model and carefully remove it.
- Using this technology, you can make a snowman, only the balls must be of different diameters.
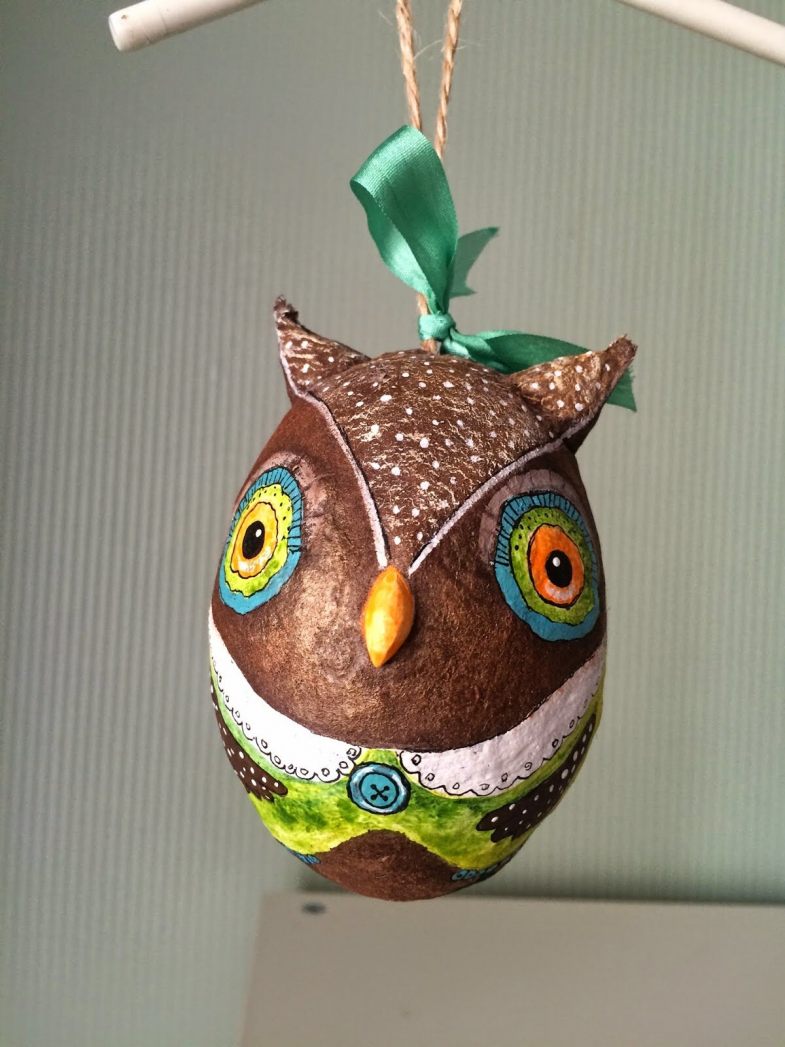
Also, using the technology with balloons, you can create a beautiful composition for Easter.

Bunny
We make a bunny in the same way:
- We glue the balloon, leave it to dry completely and shape the head.
- To do this, we take any plastic, coat it with a thin layer of paste dough (only a little thicker) and leave it to dry as well.
- Next, we moisten the brown head with water and glue it to the main part using the same dough. We make the ears from dough and glue them with dough and toilet paper.
- After complete drying, we make a small hole in the bottom of the craft, pierce the ball and carefully remove it.
- And the last step is to paint the resulting figure in any way.


bear
For this sculpture, it is better to use the sculpting technique.
- When creating this masterpiece, it is better to use a wire frame prepared in advance by an educator or teacher.
- The previously prepared paper is gradually applied to the frame, and gradually, applying layer by layer, the desired figure is sculpted.
- Or another option is to prepare a figure into which the same mixture is poured and left to dry completely.
- After that, the form is carefully disassembled and it remains only to paint the resulting sculpture.
- In any application of technology, it is best to use a brush to less stain your hands and work area, after laying oilcloth or cling film.

Be sure to teach students the rules for using all material.

Photo papier mache crafts


